RASC Calgary Centre - Measure Moons 1
Measure Moons 1
by Jason Nishyama
Page last updated November 5, 2018
Doing science from your back yard - Measuring the orbital periods and radii of the Galilean moons
of Jupiter Part 1
Astronomy is an observational science, that is what we know about the universe is through the
observation and measurement of the objects in the night sky. For a good deal of amateur
astronomers however, astronomy is more observation than measurement. Now a good deal of what is
currently measured in modern astronomy and astrophysics requires equipment that is beyond the
affordability of the average amateur astronomer but this does not mean that amateurs can't do any
measurement. In this two part article I will describe how with basic equipment from one's own back
yard one can use measurements that will allow you to determine the orbital periods and radii of
the four Galilean moons of Jupiter. Though this information is well known to the astronomy
community, this is a good first project in quantitative astronomy for the amateur.
The equipment you need to do this measurement is quite basic. A telescope powerful enough to see
the four Galilean moons of Jupiter as well as resolve Jupiter as a disk and a tripod of some sort
to mount the telescope, a motorized drive is not needed. An eyepiece with some decent
magnification is also useful as the larger the disk of Jupiter appears, the more accurate your
measurement will be. A reticle eyepiece, that is one with lines across the field of view, is an
asset but not essential. Finally a source of accurate time and timing. A watch that has recently
been set to WWV can be used to record the time of observation as well as a stopwatch for the
timing. Pencil and paper to record your observations. I prefer a pencil to a pen as pencils tend
to not freeze up in cold weather nor smudge with dew.
Measurement is quite simple. Point the telescope at Jupiter, if your mount has a motor drive make
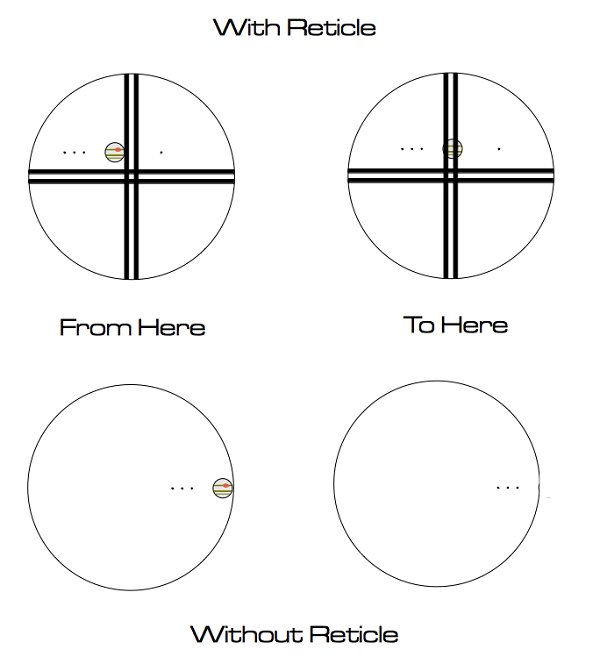
sure the drive is off. If using a reticle eyepiece, time the time it takes Jupiter to cross the
edge of the reticle line, if using a regular eyepiece time the time it takes Jupiter to disappear
from the eyepiece once it touches the western edge of the eyepiece (see Figure 1). This will give
a time for Jupiter's diameter, we will need this later. For better results, perform this
measurement more than once per observing night. Record the time that you started each measurement
as well as the time it took Jupiter to transit your reticle or eyepiece edge.
Next measure the time it takes from the time the westernmost moon touches the reticle or edge of
your eyepiece to when the westernmost limb of Jupiter touches the reticle. Doing this multiple
times will increase your accuracy. Repeat for each moon on the western side of Jupiter. Once the
moons on the western side of Jupiter are done, measure the moons on the eastern side by timing
from the eastern edge of Jupiter to the moon. Record these times as a negative value (i.e. 5.2
seconds as -5.2 seconds), this will aid with the data reduction later.
You will need to do these observations as many times as you can in a two to three month period.
You want to avoid measurements beyond this as the distance between Jupiter and the Earth will
change enough beyond that time that the increase (or decrease) in light travel time will introduce
significant errors in your measurements. You want to do many as many observations in this period
as time and weather allow, ideally nightly. This will provide a large data set and larger data
sets aid in the data reduction process. Since the drift rate for the moons is generally less than
a minute (of time), many observations can be performed in less than an hour depending on how long
it takes to set up and take down the telescope.
In the next part to this article I will describe how to compute the orbital periods and radii from
the collected data.
|

